Chapter 12 Table Magic
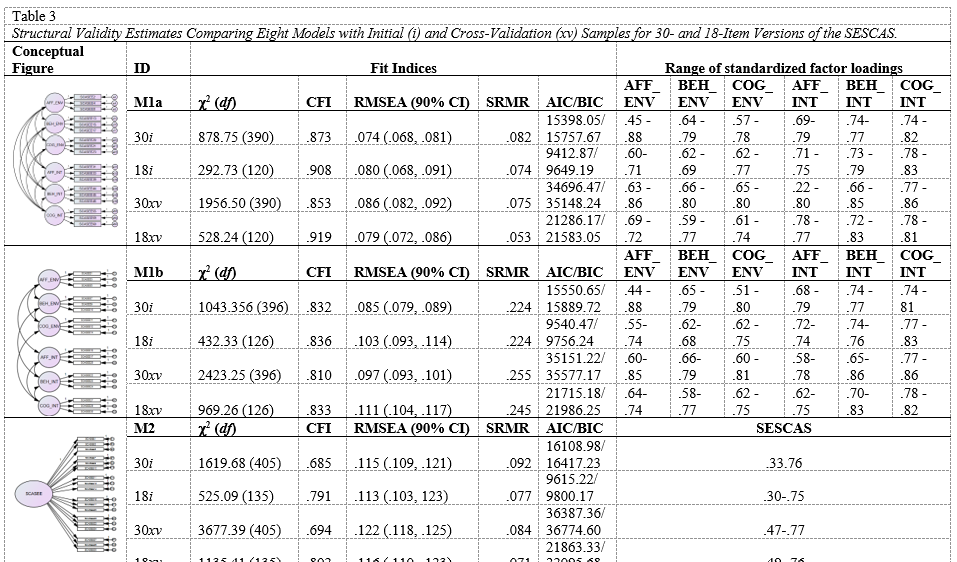
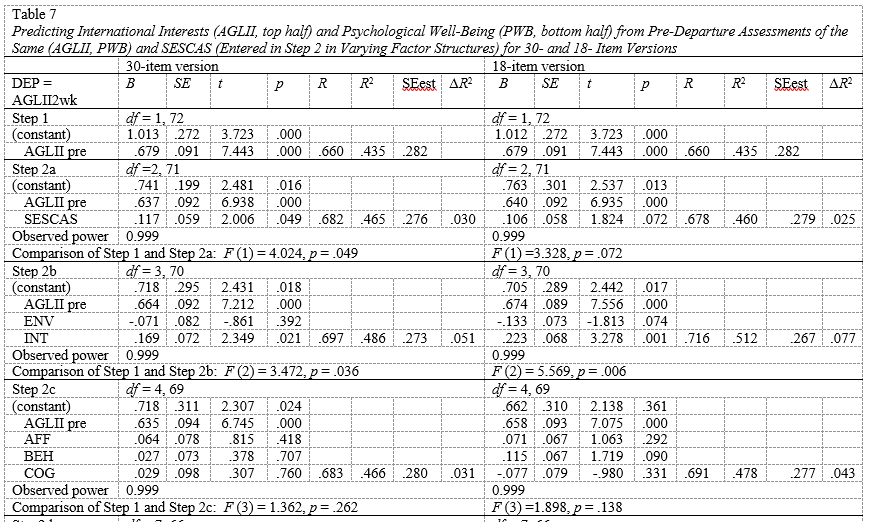
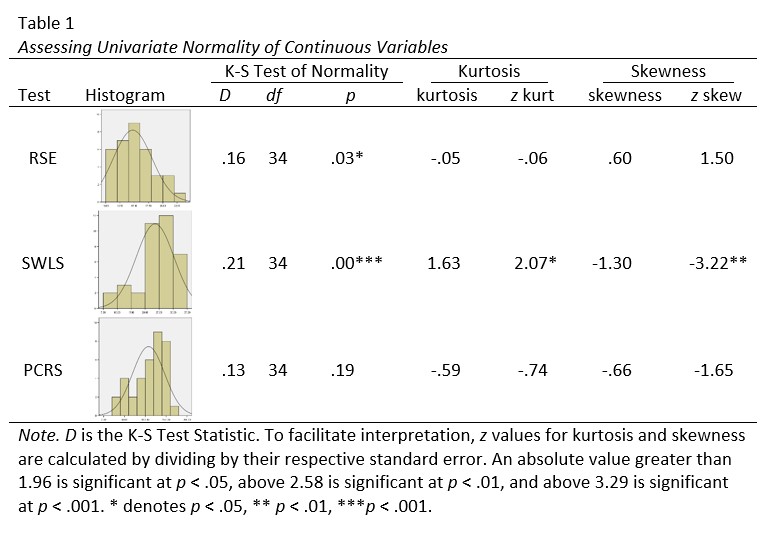
Fluency with the skills in this lecturette will be essential as you format tables for papers, journal articles, posters, and your dissertation. When you use formal table skills (in Word or Excel…and the basics transfer well from one to the other), then the tables are less likely to corrupt and require reformatting when you transfer them from document to document.
12.2 Magic Happens When You…
Place individual elements into separate cells of a table (as opposed to tabs and spacing) tool “holds them place”.
- Item stems will word-wrap.
- Decimals are easy to manage.
- The table borders allow the author to identify formatting choices and make changes without impacting the remainder of the table (when relying on tabs and margins, existing formatting is not always obvious).
12.2.1 Starting the Table
Start with the insert ribbon and the table icon.

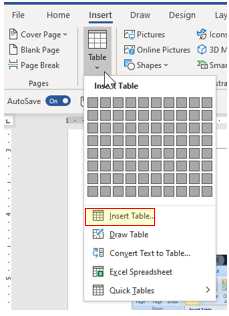
Either “color in” the row x column dimensions or click Insert Table to get a dialogue box where you can enter the number of columns and rows.
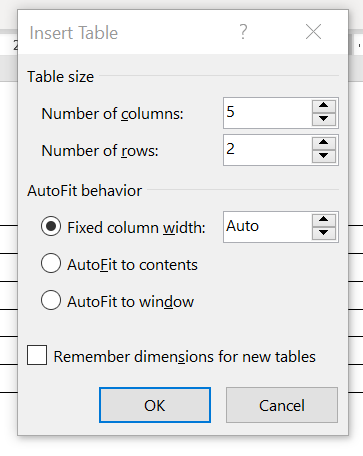
Screenshot of the window allowing the user to specify the number of columns and rows in a table
12.2.2 A Few Handy Tools
For borders and shading
- To obtain the borders/shading menu, right click on the table or select it from the table menu in the upper toolbar.
- Select “none” to make the table lines invisible.
- In some cases you may want to leave table lines (or some of the grid).
- Hint: I turn on (and leave on) ALL the borders until I’m finished…then selectively make them invisible.

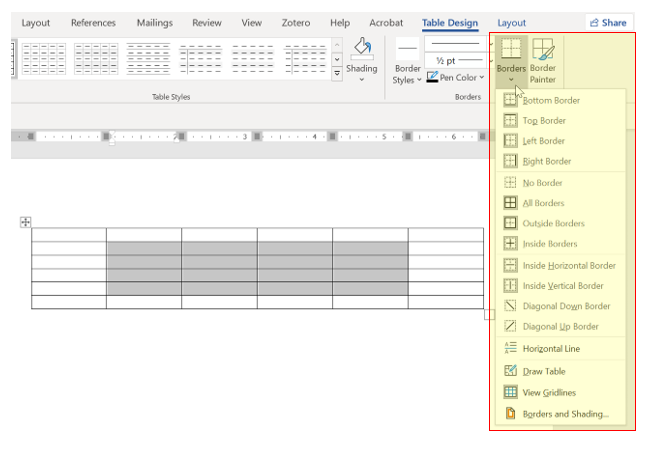
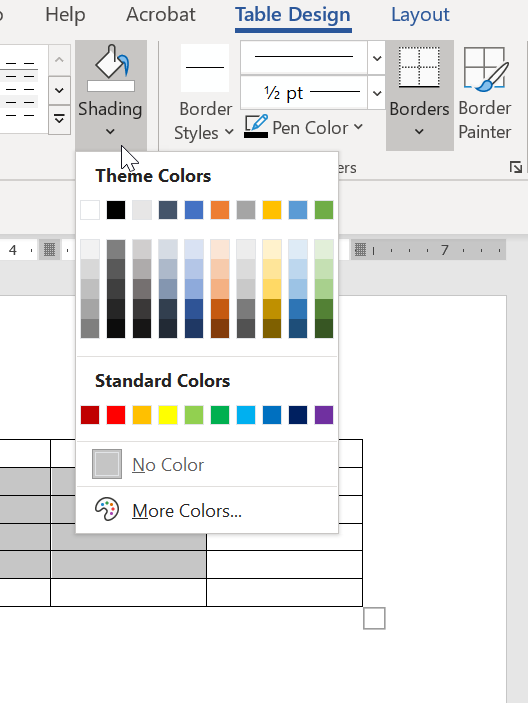
Screenshot of tools used to add shading to rows, columns, and cells
For cell alignment, right click on the cells of interest. The Cell Alignment tool allows you to specify by cell(s), row(s), or column(s) how the text should align.
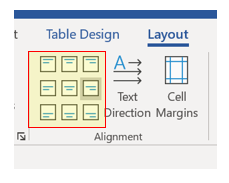
Screenshot of tools available for specifying horizontal and vertical cell alignment
Merging cells allows two or more cells to become one. This can occur vertically or horizontally. Drag across the cells you want to merge. Right click, then select Merge Cells.
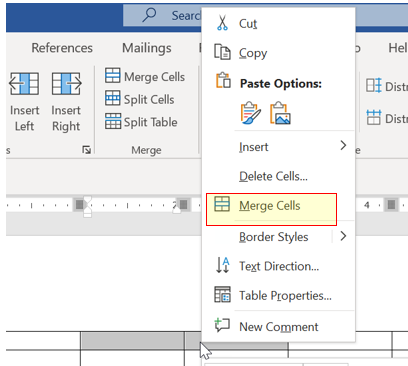
Screenshot of the Merge Cells option
Need two cells separted? The split cells tools will subdivide a single cell into the desired rows and columns. Place your cursor into the desired cell. Right-click, then select Split Cells.
Columns or rows out-of-whack? The Distribute Rows and Distribute Columns tools are incredibly powerful and can be used to “even-out-the-space” of either.
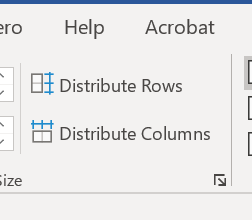
Screenshot of the Distribute Rows and Distribute Columns tools
Didn’t quite plan right? Right-click in the cell to Insert or Delete rows, columns, or cells.
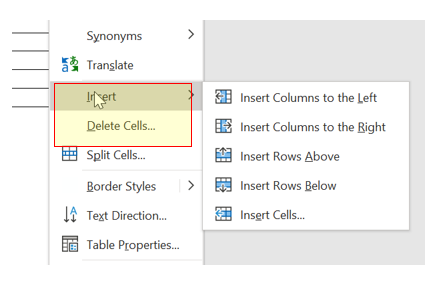
Screenshot of the Insert and Delete tools
Alternatively, if you just want to add a row, position your cursor just outside of the row immediately above where you want the row added and ENTER.
12.2.3 Decimal Magic
Tabs (for alignment in columns) are in teh upper right, below the toolbars. Clicking through the tabs changes the option. “Click” until the decimal symbol appears.
Once it shows, highlight the column (or row) for which you want to set a decimal place.
If numbers don’t automatically align, try backspacing or CTRL_TAB.
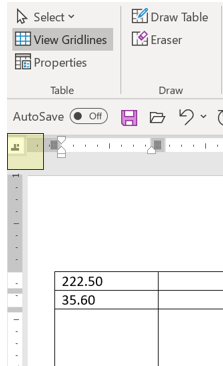
Screenshot of the Decimal Tab
12.2.4 More Help from Table Properties
The Table Properties window can offer advanced options or rows, columns, cells, and the table as a whole.
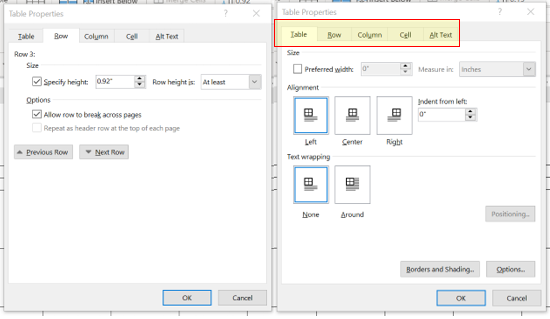
Screenshot of the Table Properties dialogue box
